Everyone has seen clothing items that have been colored by the process known as tie-dyeing; many may have wondered how easy it would be to tie-dye a shirt
When our SeekiSearch team checked out the subject, they were surprised to learn that it wasn't nearly as complicated as they had believed.
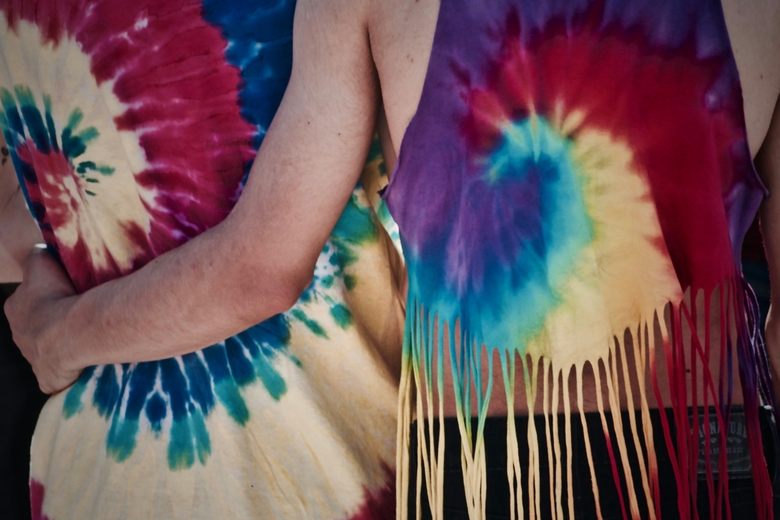
Provided you're willing to invest a little time, it is possible to produce some really stunning colors and designs with minimum effort and not much money.
Basically, you just need a white T-shirt, some dye, a little patience, and to follow the 12 steps below.
Of course, as the saying goes, 'practice makes perfect', so you may need to experiment a little before achieving exactly what was in your imagination.
But the beauty of the tie-dyeing process is that it's almost impossible to make a mistake. There's no such thing – simply a slightly different color mix or pattern, which may turn out better than your original idea!
So, why not give it a try? We've made it easy for you with our simple step-by-step instructions. Follow them, and you'll know how to tie-dye a shirt in minutes
Happy dyeing!
Step 1: The shirt
The best shirts to use are made from 100% cotton.
50% cotton/50% polyester is possible but the colors are not so strong.
100% polyester will not work – the dye will wash off.
Step 2: Your choice of dyes
Dye kits from craft stores come with everything you need.
They comprise rubber gloves, rubber bands, soda ash,urea, and easy to follow instructions.
The dyes are in squeeze bottles, just add warm water.
Step 3: The Tools
If you don't use a a pre-packaged kit, you will need the following
Procion dye, rubber bands, rubber gloves, squeeze bottles,urea, soda ash, and paper towels.
A good dye remover.
Step 4: Soaking the shirt
Soak the shirt in a solution of warm water and soda ash for about 10 minutes.
Be sure to have the correct mix of soda ash.
Do not use water that is too hot or too cold.
Add a couple of tablespoonfuls of common salt to the mix.
Make sure the mixture is thoroughly dissolved before adding the shirt.
Wring the shirt out thoroughly.
Wear rubber gloves at all times as the soda is caustic and will sting.
Step 5: Tying a rainbow swirl pattern
Place the shirt on a flat surface.
Place it right side down, if you want a sharper pattern on the front of the shirt.
Reverse it if your prefer the pattern on the back.
Place a dowel rod in the center of the shirt and start turning until you have a nice flat pie shape.
You can rotate the pin in either direction.
Step 6: Achieving a Pie
The shirt should be shaped like a pie at this stage.
Remove the dowel and put on one rubber band.
The trick is to place the band, without disturbing the shirt.
Try to ensure that the pie is firm and uniform.
Step 7: Join the band
Now slip other rubber bands over the pie in various directions.
Turn the pie over and add more bands.
It is important to retain the shape.
Around 10 bands will be sufficient.
Keep the whole thing as flat as you can.
The shirt is now ready for dyeing.
Step 8: The Dyeing process
Cover your working surface with plastic.
You need to wear old clothes and shoes as the dyes will stain your clothes and everything else.
Prepare paper towels or rags rags to mop up spills.
Step 9: Actually using the dyes
Place your shirt "pie" on some paper towels on top of a paper plate on your working surface.
This makes it easier to flip the whole thing over when dying the other side.
Wear rubber gloves!
You only really need three basic colors: fuchsia red, turquoise and lemon yellow.
To make a rainbow swirl shirt, think of your "pie" is an actual pie chart.
Working from the center of the shirt, dye one third of the shirt lemon yellow.
Dye the second third of the shirt fuchsia red and the final third, turquoise.
Do not leave any white spaces showing - the "white" is hiding within the folds.
Overlap the colors at the edges of each section to achieve other rainbow colors.
Always put yellow - (or other light colored dyes) - first. If you cover it up by mistake, it will change to something else (either orange or green) and you can't reverse the process.
When you have completed the first side, turn the whole thing over.
Apply the dye on the second side in the same way..
Step 11: Now you just have to wait
After completing the dyeing, put the shirt into a zip lock bag and seal it up tight.
Put the bag in a warm place and leave it for AT LEAST 24 HOURS!
Step 12: Unwrap the shirt wearing rubber gloves!
Take the shirt out of the bag.
Rinse the shirt off under cold running water.
You can remove the bands before or after rinsing.
BE CAREFUL. If this is your first attempt at tie-dyeing, you will be amazed at the amount of dye that pours out as you are rinsing.
Keep rinsing until the water runs clear - it may take a while.
If you followed the instructions, the beautiful pattern will be revealed.
Now wash your shirt in the normal way in a washing machine (by itself for the first time).
Some people prefer to continue washing the shirts two or three times on their own, before trusting them with other clothes.
So know that you know how to tie-dye a shirt, how about moving on to something else.
How about a scarf, or perhaps a cotton sheet or some cotton pants or shorts; you're only limited by your imagination.
If you have other ideas, or any other remarks about tie-dyeing, just tell us in the comments section below.